Toolchain
These are the sets of tools that are used by Teraciers to create products. All Teraciers must master these tools.
Git
Vim
Sublime Text
At Teracy, you are recommended to use the Sublime Text editor for writing codes, markup and documents. You can download and install it at http://www.sublimetext.com/.
Installing useful plugins
After having installed Sublime Text, you should install some plugins below:
- Package Control: Go to https://sublime.wbond.net/ –> Click Install Now.
Note
You need to have Package Control installed and restart the Sublime Text before installing the following plugins.
SublimeCodeIntel: supports all the languages Komodo Editor supports for Code Intelligence.
Web Inspector: works on the top of WebInspectorProtocol. All information is displayed in console and text files.
BDD Tools: highlights syntax of .feature files. You should install some packages, including: Behat, Cucumber, and Gherkin/Cucumber Format.
Local History: maintains the local history of a file.
Trailing Spaces: Allows highlighting trailing spaces and delete them in a flash.
For example, to install the SublimeCondeIntel, do as follows:
- Open the Sublime Text editor.
- Press Command + Shift + P (on OS X) / Ctrl + Shift + P (on Windows/Linux); Or click Tool –> Command Pallette… –> Type Install into the Command Pallette –> select Install Packages from the list –> hit Enter and wait while the Package Control fetches the latest package list –> Type SublimeCodeIntel.
Overring default settings
You must always enable white space characters and set ruler to 100 characters by overriding the default settings.
- Open the Sublime Text editor.
- Click Preferences –> Settings - Users –> Copy and paste the content below into the settings:
{
    "color_scheme": "Packages/Color Scheme - Default/Solarized (Light).tmTheme",
    "draw_white_space": "all",
    "font_size": 12,
    "rulers": [
        100
    ],
    "tab_size": 4,
    "translate_tabs_to_spaces": true,
    "trailing_spaces_trim_on_save": true
}
Jira Client
This section shows you how to use Jira Client to manage your Teracy issues.
Downloading and Installation
Download Jira Client installer for Mac, Linux, Win at http://almworks.com/jiraclient/download.html and install on your local device.
Creating connection
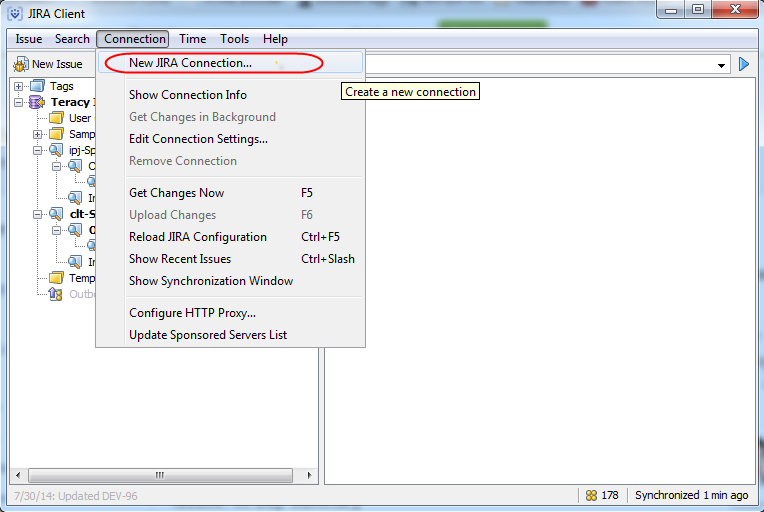
1. Open Jira Client and select Connection –> New Jira Connection to open the New Jira Connection form.
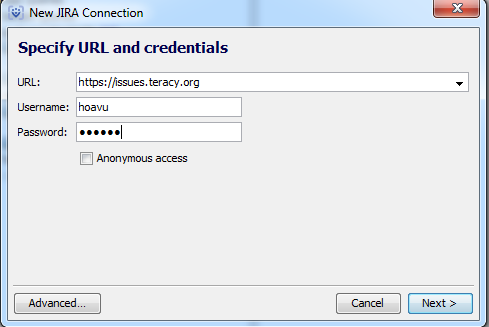
- Input the Jira URL of Teracy
https://issues.teracy.orginto the URL field.
- Input your username and password used to log in Jira.
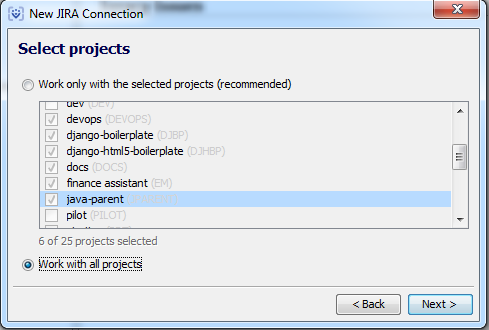
- Click Next to verify your login and select projects you work with.
- Click Next to name your connection and click Finish to complete creating your Jira connection.
Creating queries
You need to create some queries to manage your issues easily. At Teracy, you are recommended to create queries with the hiearachy as the example follows:
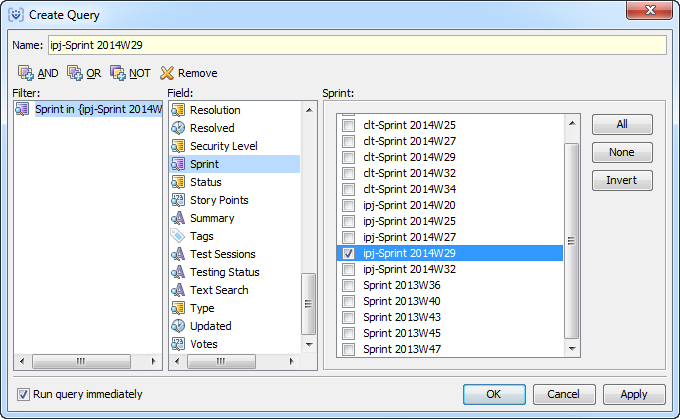
1. Creating new query by Sprint
Right-click your connection name –> Select New Query –> Select Sprint in the Field column and select your desired sprint in the Sprint column –> click OK.
Note
For each sprint, you should create a query for it.
2. Creating new query by status
You need to create three queries by status for each sprint: Open/Reopened, In-progress and Resolved.
Open, Re-opened
Right-click a query by sprint –> Select New Query –> Select Status in the Field column –> Select Open and Re-open –> Click OK.
In-progess: Do the same as Open, Re-opened.
Resolved: Do the same as Open, Re-opened.
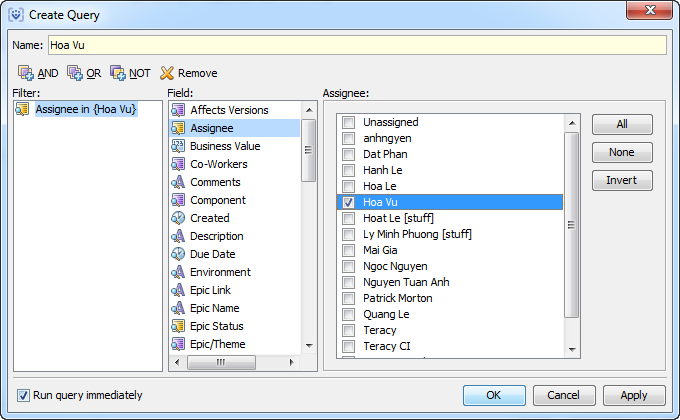
3. Creating new query by assignee
For each status, you will create a query by assignee as follows:
- Right-click a status –> New Query –> Select Assignee in the Field column –> Select a assignee in the Assignee column –> Click OK.
Editing and Removing queries
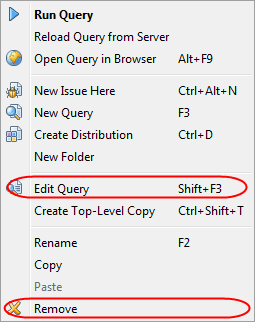
You can easily edit or delete a query by right-clicking the query and select Edit Query or Remove in the context menu respectively.
Reloading query from server
Sometimes, you need to reload all issues for a query by right-clicking the query and selecting Reload Query from Server from the context menu.
Tracking time
At Teracy, you are recommended to use the Jira Client to track off your working time for each issue every day. Jira Client measures the exact time you’ve spent on the issue.
Starting tracking time
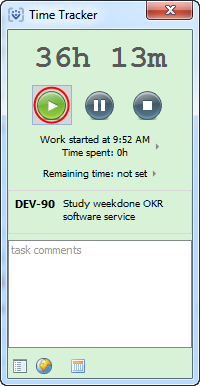
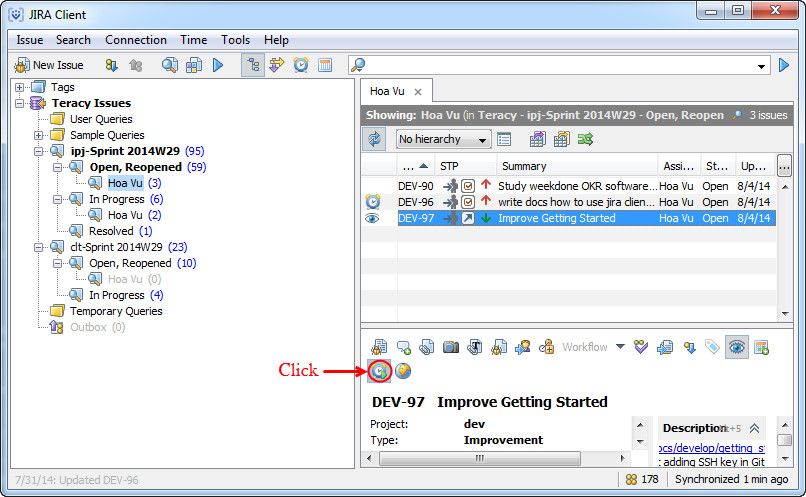
Select your issue you are working on and click the Start button to begin tracking time.
Stopping tracking time
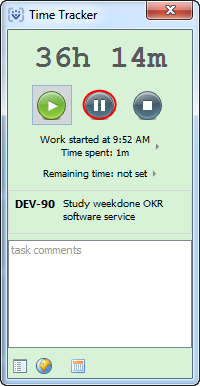
When you pause to work or finish your issue, you can stop tracking time by clicking the Stop button.
Switching to another issue
When switching to another issue and you want to record time spent on the issue, open issue and click the Record button.
Adjusting time and duration
You can also adjust time and duration by clicking the time recorded on the Time Tracker.
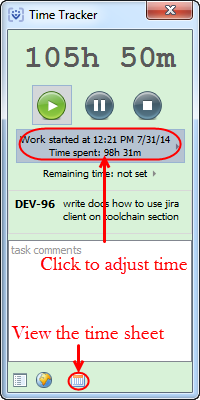
Later, you can review the time sheet, make corrections and publish tracked time to JIRA as work logs.
Note
You can see further usage of Jira Client at http://almworks.com/jiraclient/features.html.
