PHP Development Guide
By default, LAMP (Linux - Apache - MySQL - PHP) stack and LEMP (Linux - Ngix - MySQL - PHP)
stack are both installed on the teracy-dev VM with the following configuration:
{
  "nginx": {
    "enabled":true,
    "default_root": "/home/vagrant/workspace/personal",
    "listen_port":9998,
    "version": "1.7.8"
  },
  "apache":{
    "enabled":true,
    "default_root": "/home/vagrant/workspace/personal",
    "listen_port":9999
  },
  "php":{
    "enabled":true,
    "version":"5.4.29", //empty string: default ubuntu distribution; http://php.net/downloads.php
    "checksum":"9caf973b19ba93bb2b78f78c61643d5d"
  },
  "mysql":{
    "enabled":true,
    "version":"5.3.6",
    "password":"teracy"
  }
}
Make sure you have the teracy-dev VM running ($ vagrant up) by following the
Getting Started guide.
Verify LAMP and LEMP
$ vagrant ssh and check:
Linux
$ uname -a
Linux vagrant 3.5.0-45-generic #68~precise1-Ubuntu SMP Wed Dec 4 16:18:46 UTC 2013 x86_64 x86_64 x86_64 GNU/Linux
Apache
$ apache2 -v
Server version: Apache/2.2.22 (Ubuntu)
Server built:   Jul 22 2014 14:35:32
Nginx
$ /opt/nginx/sbin/nginx -v
nginx version: nginx/1.7.8
MySQL
$ mysql -u root -pteracy;
And you should see the following output:
Welcome to the MySQL monitor.  Commands end with ; or \g.
Your MySQL connection id is 37
Server version: 5.5.38-0ubuntu0.12.04.1 (Ubuntu)

Copyright (c) 2000, 2014, Oracle and/or its affiliates. All rights reserved.

Oracle is a registered trademark of Oracle Corporation and/or its
affiliates. Other names may be trademarks of their respective
owners.

Type 'help;' or '\h' for help. Type '\c' to clear the current input statement.

mysql>
Type
exitto exitmysqlshell:mysql> exit;
PHP
$ php --version
PHP 5.4.29 (cli) (built: Mar 10 2015 12:20:28)
Copyright (c) 1997-2014 The PHP Group
Zend Engine v2.4.0, Copyright (c) 1998-2014 Zend Technologies
Open http://localhost:9998 to see Nginx serving the workspace/personal directory by default.
Open http://localhost:9999 to see Apache serving the workspace/personal directory by default.
info.php Page
Create info.php on the workspace/personal/info directory:
$ ws
$ cd personal
$ mkdir info
$ cd info
$ echo "<?php" > info.php
$ echo "  phpinfo();" >> info.php
$ echo "?>" >> info.php
After the command lines above, you should have the workspace/personal/info/info.php file with the following content:
<?php
  phpinfo();
?>
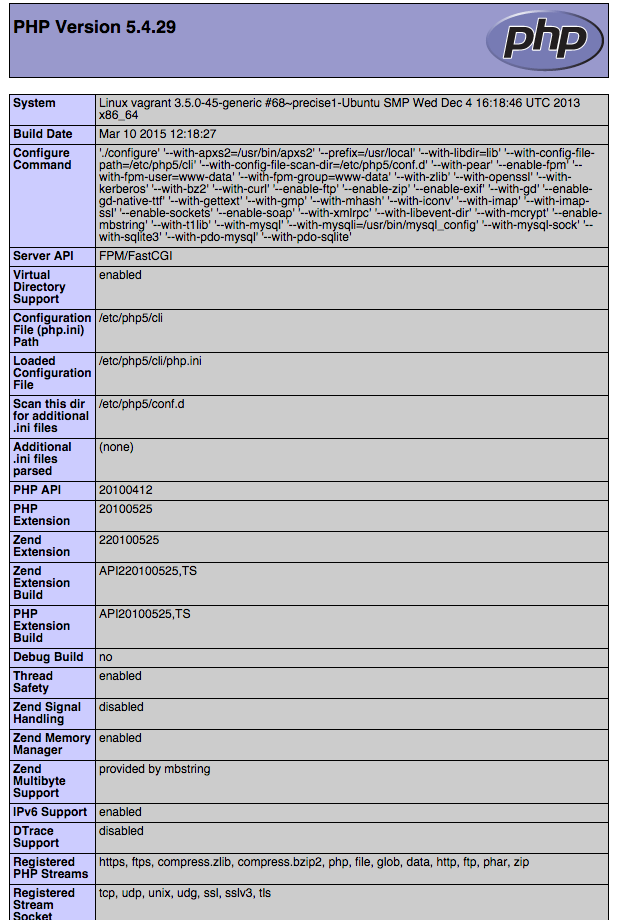
Open http://localhost:9998/info/info.php you should see php info of the system like the screenshot below:

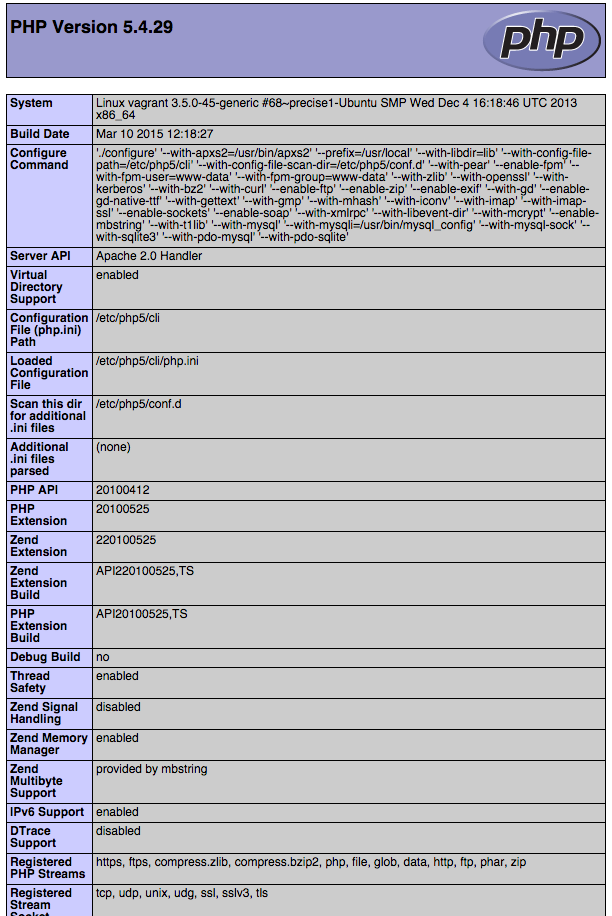
Open http://localhost:9999/info/info.php you should see php info of the system like the screenshot below:

Composer Installation
Basing on https://getcomposer.org/doc/00-intro.md#globally:
$ ws
$ cd personal
$ curl -sS https://getcomposer.org/installer | php
$ sudo mv composer.phar /usr/local/bin/composer
Note
We have to install Composer manually util https://issues.teracy.org/browse/DEV-207 is
done.
CakePHP Framework
We’ll follow http://book.cakephp.org/3.0/en/quickstart.html to get started with CakePHP
framework.
Install
$ ws
$ cd personal
$ composer create-project --prefer-dist cakephp/app bookmarker
Todo
CakePHP did not work out of the box, we need to fix the errors raised from composer
above by https://issues.teracy.org/browse/DEV-208
CodeIgniter Framework
We’ll follow http://www.codeigniter.com/userguide3/overview/index.html to get started with
CodeIgniter framework.
Install
$ ws
$ cd personal
$ wget https://github.com/bcit-ci/CodeIgniter/archive/2.2.1.zip
$ unzip 2.2.1.zip
And you should see CodeIgniter-2.2.1 directory after
unzip.Verify
Open http://localhost:9999/CodeIgniter-2.2.1/index.php and you should see “Welcome to CodeIgniter!” page.
You can start digging CodeIgniter framework now: http://www.codeigniter.com/userguide3/tutorial/index.html
Laravel Framework
You’ll follow http://laravel.com/docs/5.0/installation to get started with Laravel framework.
Install
$ ws
$ cd personal
$ composer global require "laravel/installer=~1.1"
$ echo "export PATH=~/.composer/vendor/bin/:\$PATH" | sudo tee --append ~/.bash_profile
$ source ~/.bash_profile
laravel new blogFrom installation step above,
laravelshould be avaiable executable.$ laravel new blogVerify
Open http://localhost:9999/blog/public/ and you should see “Laravel 5” page.
You can start digging Laravel framework now: http://laravel.com/docs/5.0/routing
Symfony Framework
You’ll follow http://symfony.com/doc/current/quick_tour/the_big_picture.html to get started with
Symfony framework.
Install
$ ws
$ cd personal
$ curl -LsS http://symfony.com/installer > symfony.phar
$ sudo mv symfony.phar /usr/local/bin/symfony
Create a
Symfonyproject$ symfony new myproject $ cd myproject $ php app/console server:run 0.0.0.0:8000
And you should see the output like:
Server running on http://0.0.0.0:8000

Quit the server with CONTROL-C.
You can start digging Symfony framework now:
http://symfony.com/doc/current/quick_tour/the_big_picture.html
Yii Framework
You’ll follow http://www.yiiframework.com/doc-2.0/guide-start-installation.html to get started
with Yii framework.
Install
$ ws
$ cd personal
$ composer global require "fxp/composer-asset-plugin:1.0.0"
$ composer create-project --prefer-dist yiisoft/yii2-app-basic basic
Note
During the installation Composer may ask for your Github login credentials. This is normal because
Composerneeds to get enough API rate-limit to retrieve the dependent package information from Github.From http://www.yiiframework.com/doc-2.0/guide-start-installation.html#installing-via-composer
Verify
Verify the installation by opening http://localhost:9999/basic/web/index.php
Todo
http://localhost:9999/basic/web/index.php (Nginx) did not work out of the box yet.
You can start digging Yii framework now: http://www.yiiframework.com/doc-2.0/guide-start-hello.html
Drupal CMS
You’ll follow https://www.drupal.org/documentation/install to get started with Drupal.
Download and extract
$ ws
$ cd personal
$ wget http://ftp.drupal.org/files/projects/drupal-7.35.tar.gz
$ tar -xzvf drupal-7.35.tar.gz
Create the database
You’ll use
MySQLfor database.$ mysql -u root -pteracy -e "CREATE DATABASE drupal CHARACTER SET utf8 COLLATE utf8_general_ci;"
You’ll use drupal as database with root as username and teracy as password by default.
Note
All the default username, password of the teracy-dev is for development only. Don’t use all the default like this on production servers.
Setup
Open http://localhost:9999/drupal-7.35 and follow installation wizard.
You can start digging Drupal CMS now: https://www.drupal.org/documentation
Joomla! CMS
You’ll follow https://docs.joomla.org/J3.x:Installing_Joomla to get started with Joomla!.
Download and extract
$ ws
$ cd personal
$ wget https://github.com/joomla/joomla-cms/releases/download/3.4.1/Joomla_3.4.1-Stable-Full_Package.zip
$ unzip Joomla_3.4.1-Stable-Full_Package.zip -d joomla
Create the database
You’ll use
MySQLfor database.$ mysql -u root -pteracy -e "CREATE DATABASE joomla CHARACTER SET utf8 COLLATE utf8_general_ci;"
You’ll use joomla as database with root as username and teracy as password by default.
Setup
Open http://localhost:9999/joomla and follow installation wizard.
You can start digging Joomla! CMS now: https://docs.joomla.org/J3.x:Getting_Started_with_Joomla!
WordPress CMS
You’ll follow http://codex.wordpress.org/Installing_WordPress to get started with Wordpress.
Download and extract
$ ws
$ cd personal
$ wget https://wordpress.org/latest.tar.gz
$ tar -xzvf latest.tar.gz
Create the database
You’ll use
MySQLfor database.$ mysql -u root -pteracy -e "CREATE DATABASE wordpress CHARACTER SET utf8 COLLATE utf8_general_ci;"
You’ll use wordpress as database with root as username and teracy as password by default.
Setup
Open http://localhost:9999/wordpress and follow installation wizard.
You can start digging Wordpress CMS now: http://codex.wordpress.org/Getting_Started_with_WordPress